How to add SEON
to your wallet?
How to install MetaMask?
Go to https://metamask.io/download.html and install the Chrome extension on your device. The MetaMask wallet can also be installed on iOS or Android mobile devices, and the desktop version extension is available for Chrome, Firefox, Brave, and Edge. In our tutorial, we only cover the desktop version for Chrome.
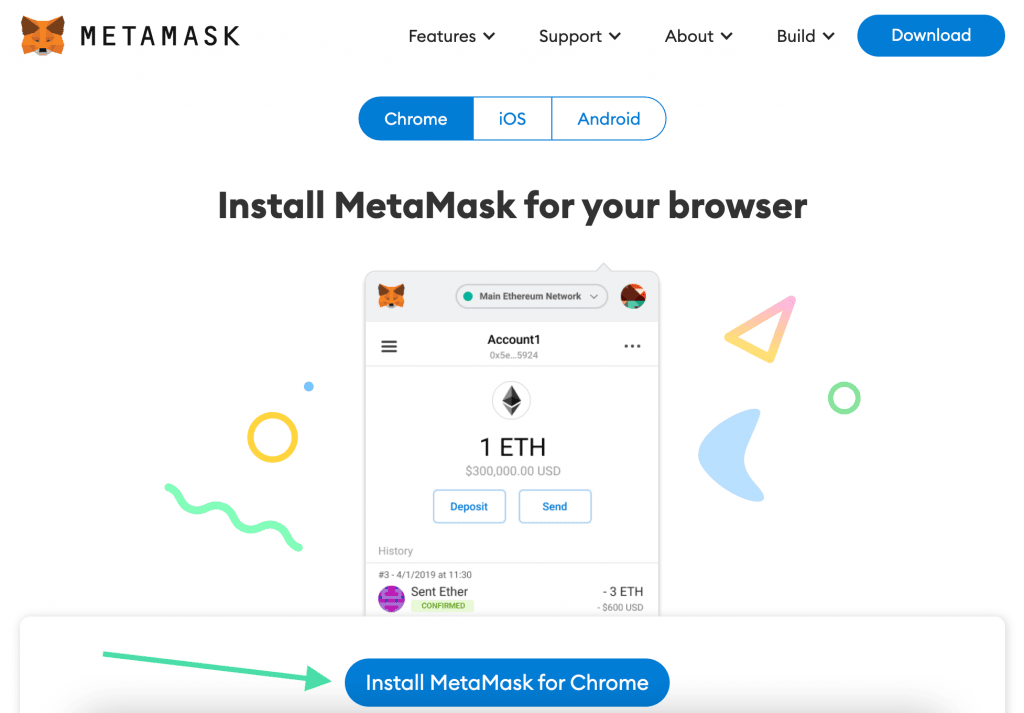
Simply click ‘Install MetaMask for Chrome’ and you will be redirected to Chrome’s web store showing all details for the MetaMask’s browser extension. As illustrated in the image below, when in Chrome web store, click ‘Add to Chrome‘ and then click ‘Add extension‘ to the pop-up being shown on your screen.
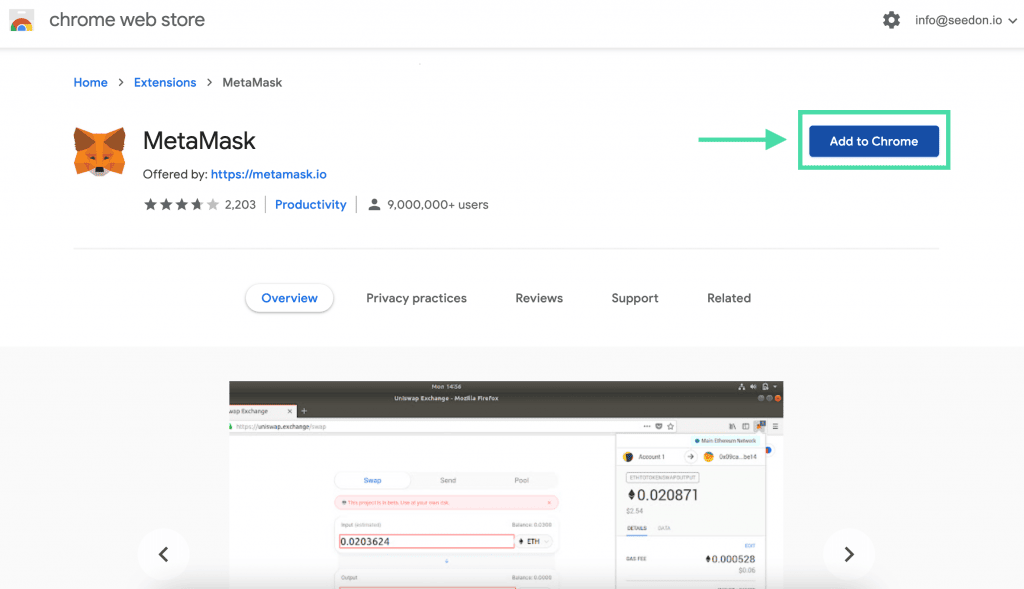
Chrome Web Store – Add to Chrome
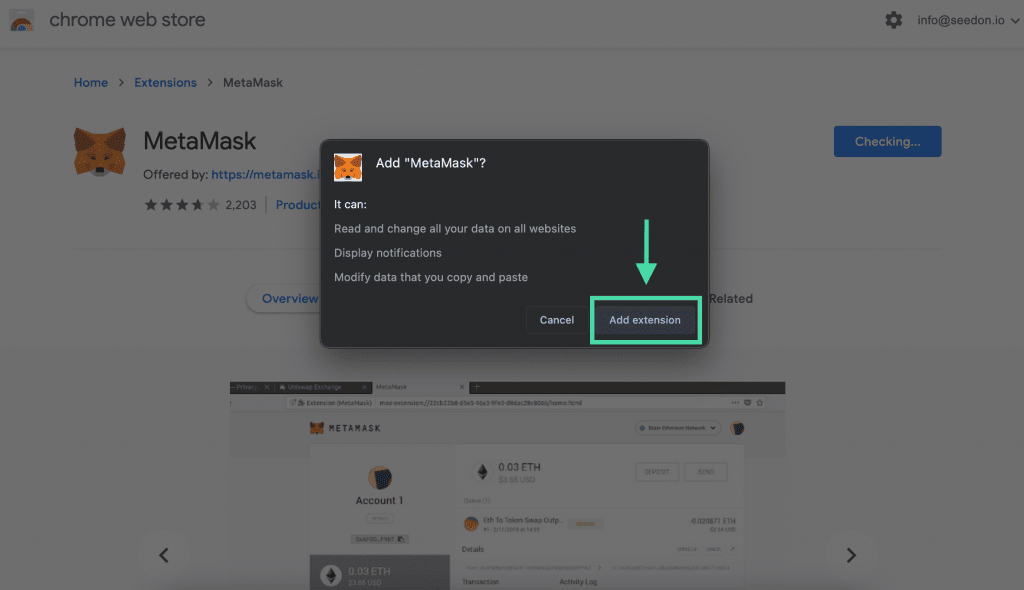
Chrome Web Store – Confirm and add extension
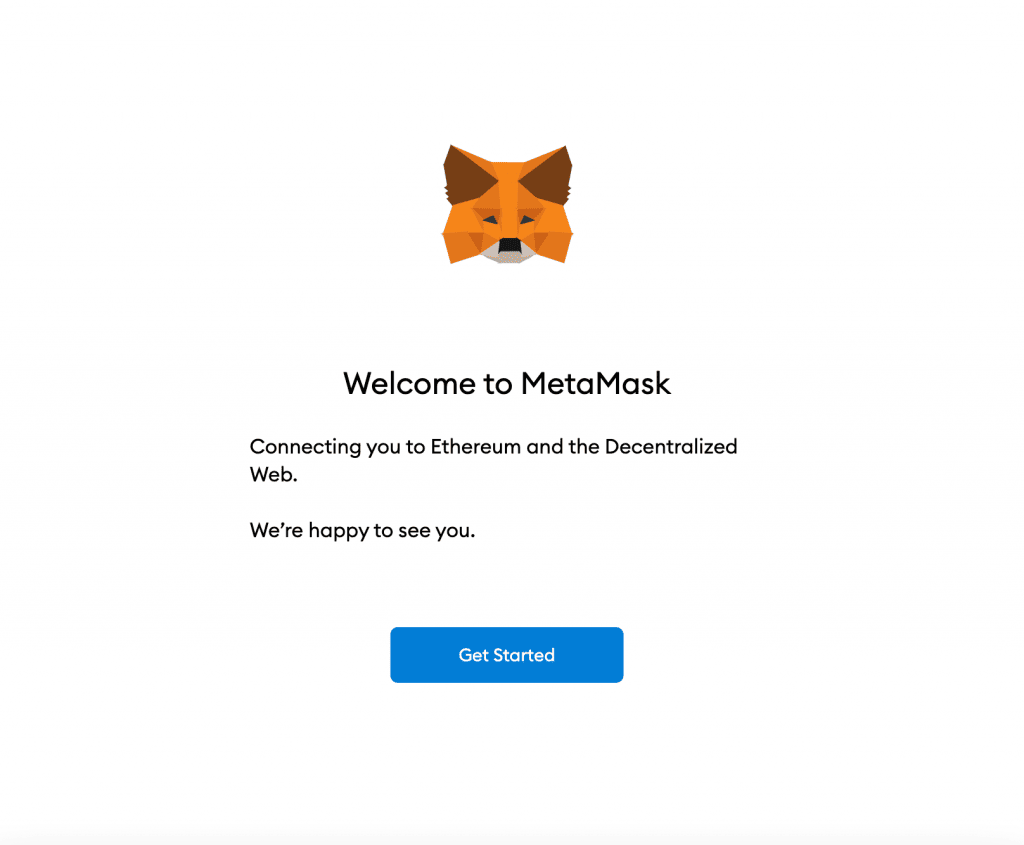
Congratulations!
You have successfully added and installed MetaMask on your device!
Steps for creating a new wallet in MetaMask
In order to setup a new wallet on your device, go ahead and click the ‘Create a Wallet’ button in the screen shown when setting up MetaMask for the first time.
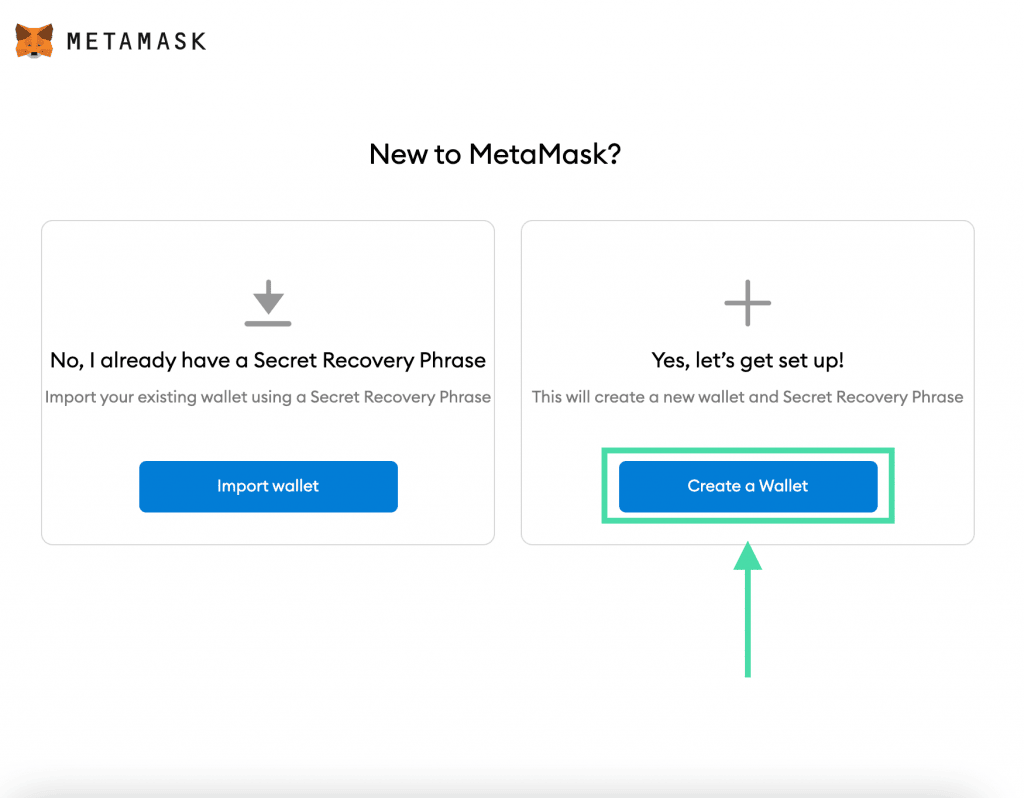
Create new MetaMask wallet
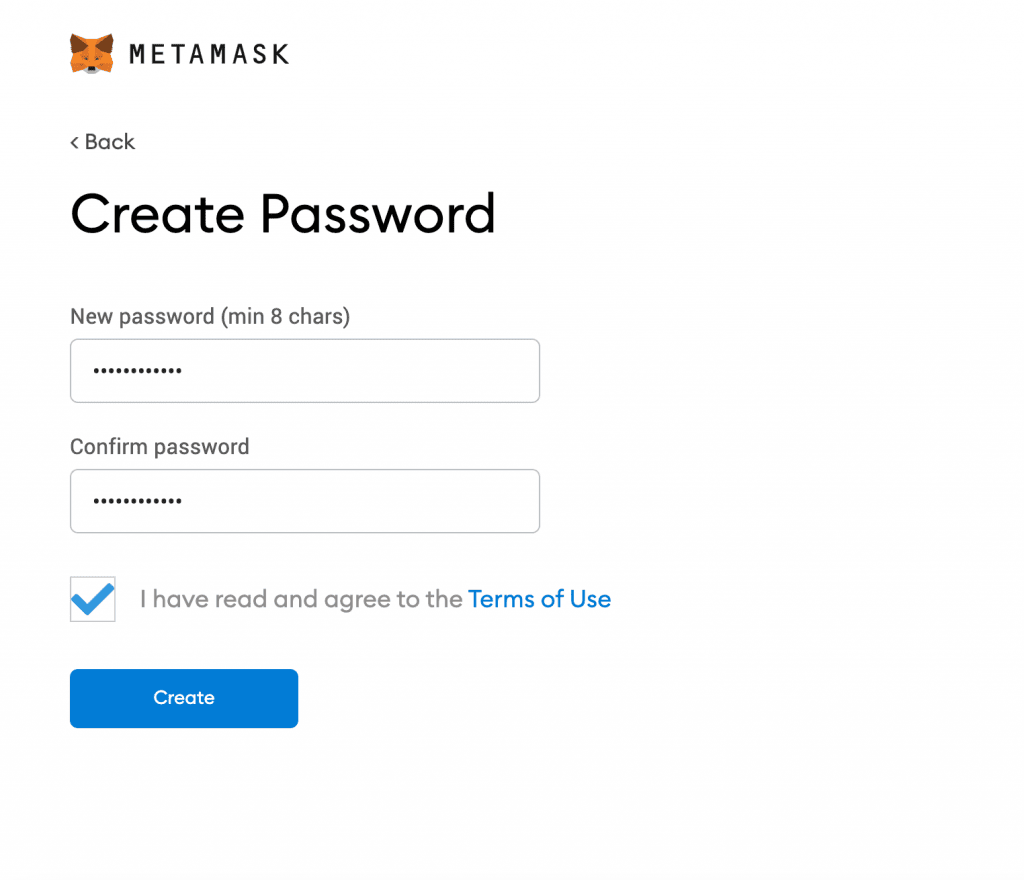
The next step implies that you add a password for your account and that you agree with MetaMask’s terms of use. Your password must be at least 8 characters long so that it will be considered valid.
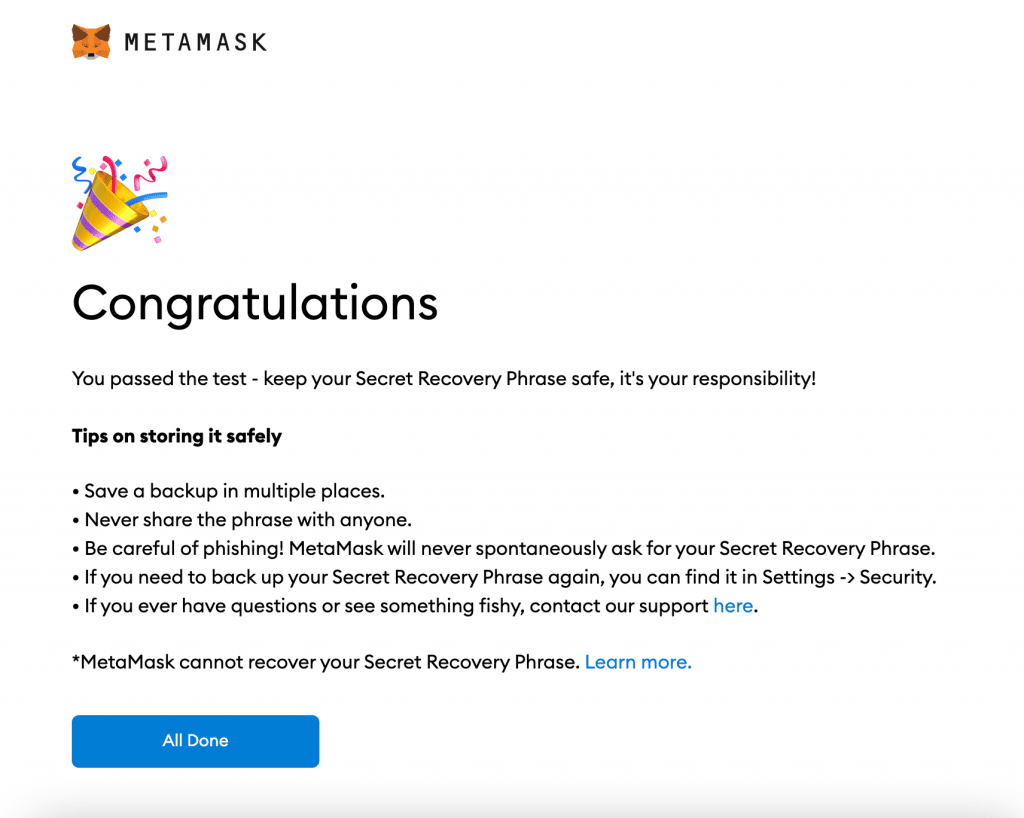
For added security, your account will be protected with a Secret Recovery Phrase. Make sure that you save the phrase being provided to you, as you can use this for recovering your password, in case it has been forgotten.
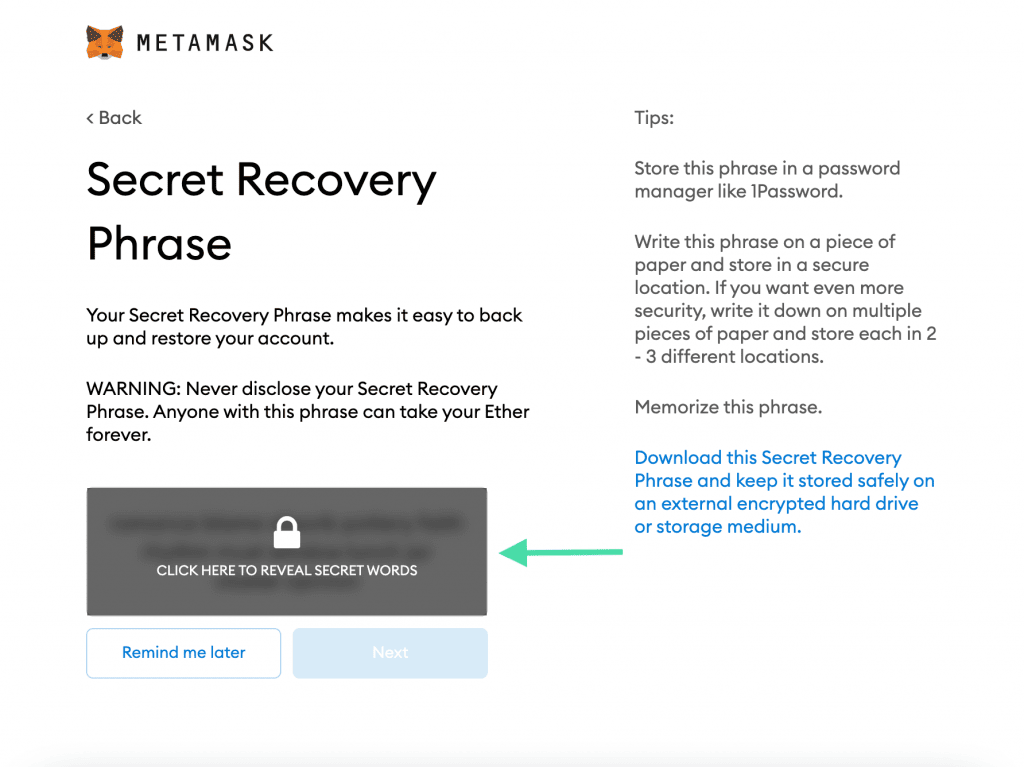
Click on the lock icon to reveal your secret recovery phrase
As part of the next step, you will have to confirm your new secret recovery phrase. On the bottom part of the screen you will find the phrase options that need to be selected in the order you have received them.
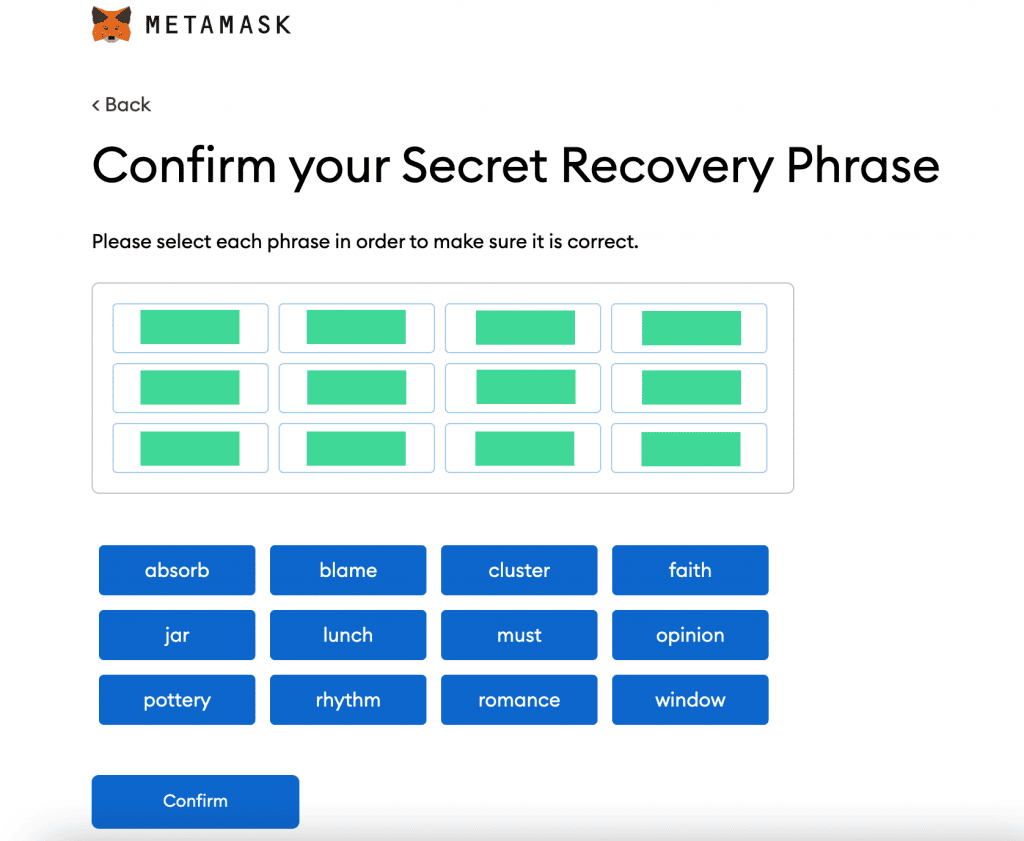
Secret Recovery Phrase confirmation
After successfully confirming the recovery phrase, you are all done! You have successfully completed the initial setup of your MetaMask wallet.
Connect your MetaMask
wallet to BSC
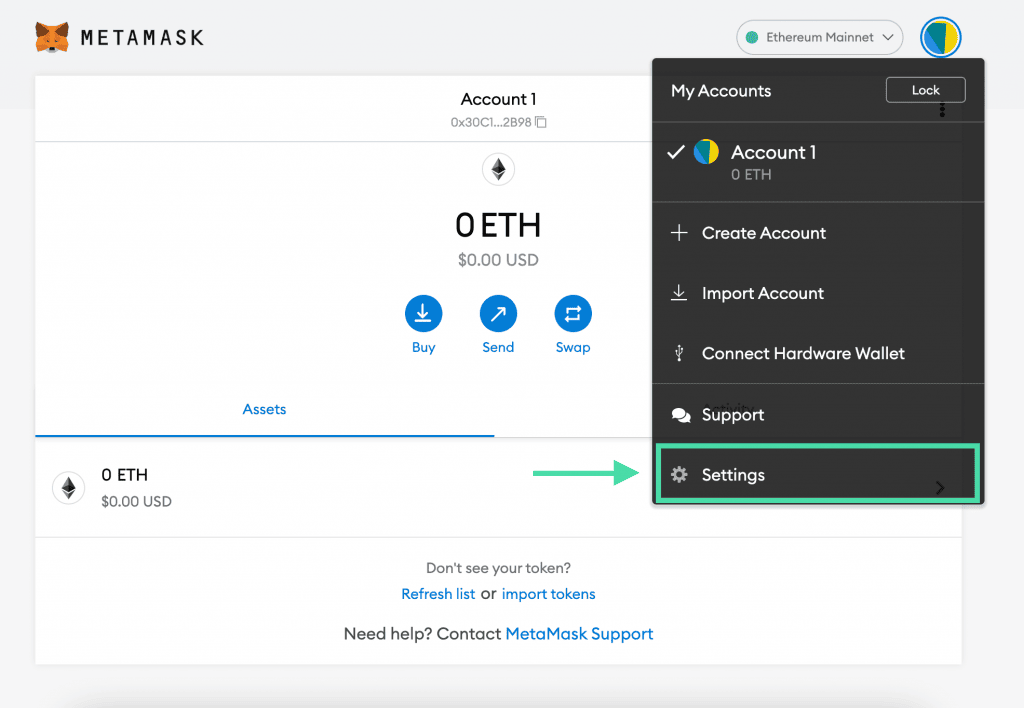
In order to be able to add SeedOn’s SEON Token to your wallet, you will first need to connect your MetaMask wallet to the Binance Smart Chain (BSC), as our SEON Token is BEP-20 compliant.
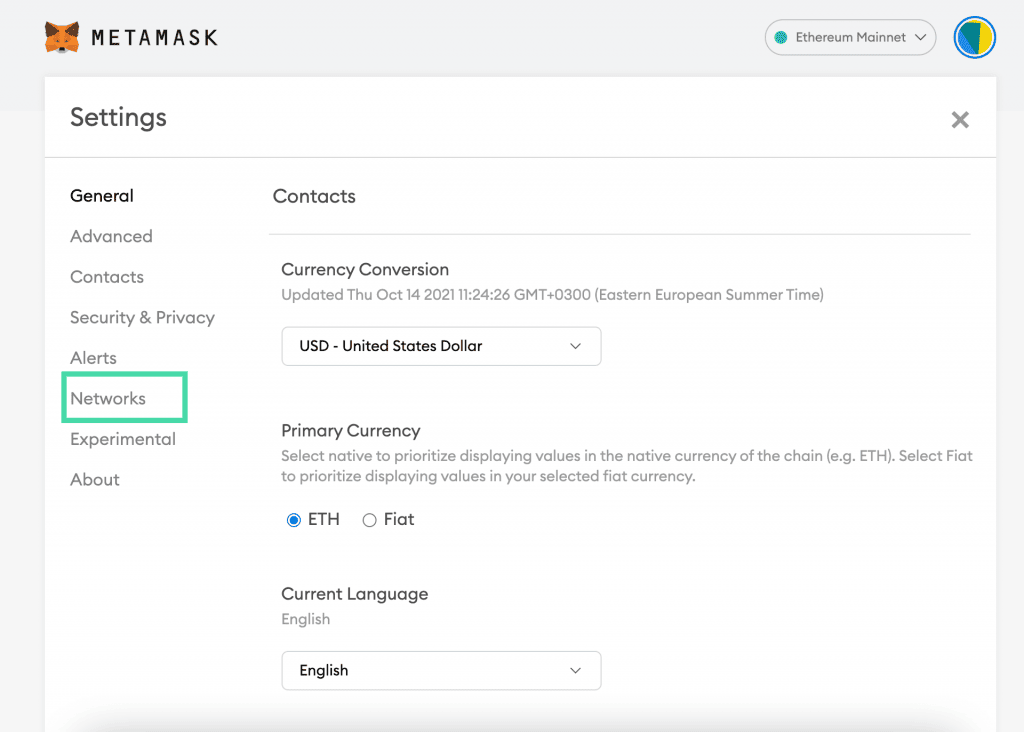
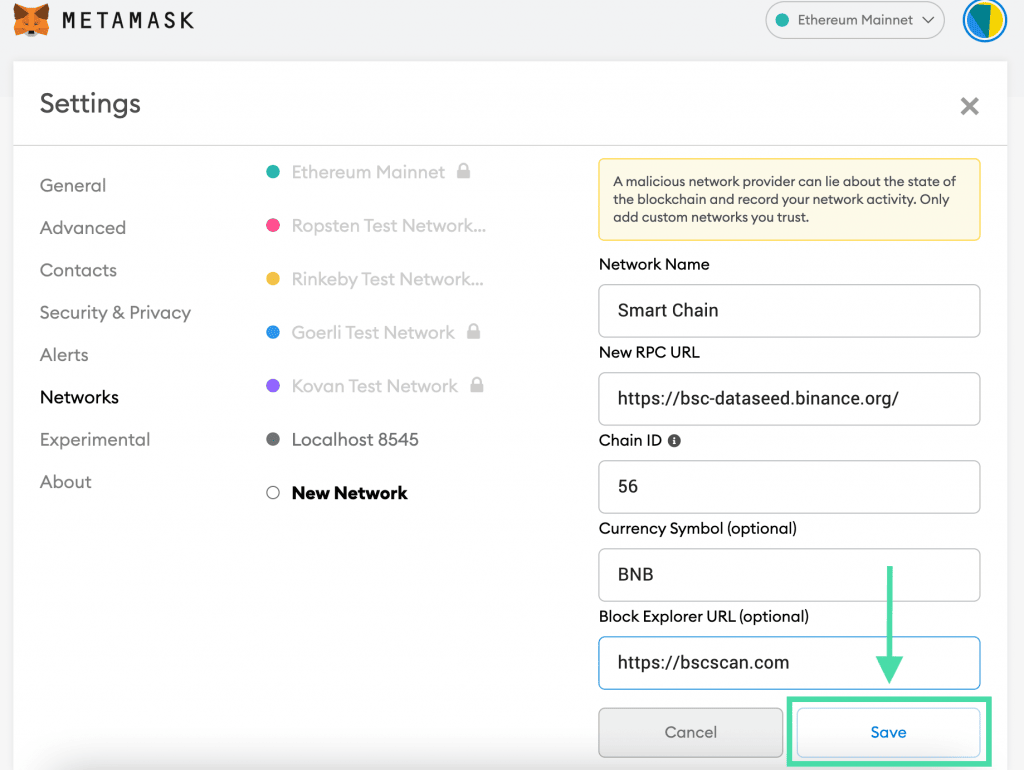
For connecting your wallet to a new network, you will need to go to the ‘Settings‘ section and choose the ‘Network‘ tab as illustrated in the screenshots below.
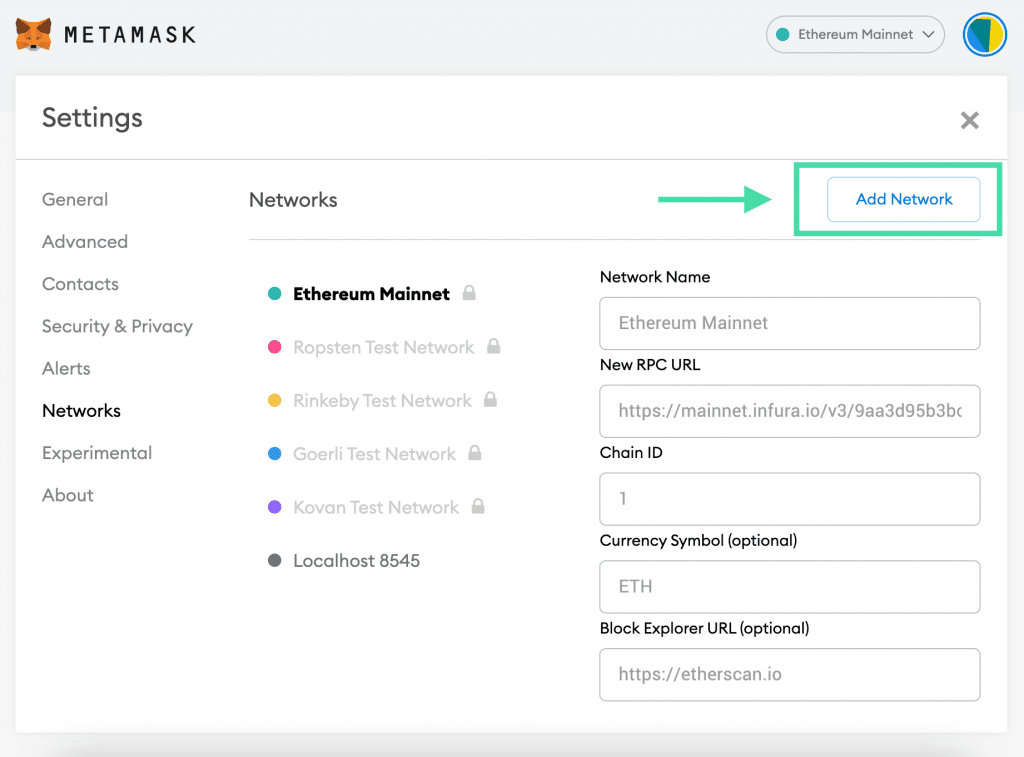
While on the ‘Network‘ tab screen, we want to click the‘Add Network‘ button in the top right corner so that we can manually input the connection information for the Binance Smart Chain. Binance provides us the possibility to connect to its two networks: Binance Mainnet and Binance Testnet. We want to connect to the Mainnet as that’s where our SEON Token is located. Below you can find the needed information to successfully connect your wallet to BSC.
Binance Mainnet
- Network Name: Smart Chain
- New RPC URL: https://bsc-dataseed.binance.org/
- Chain ID: 56 (or 0x38 in case 56 does not work)
- Currency Symbol: BNB
- Block Explorer URL: https://bscscan.com
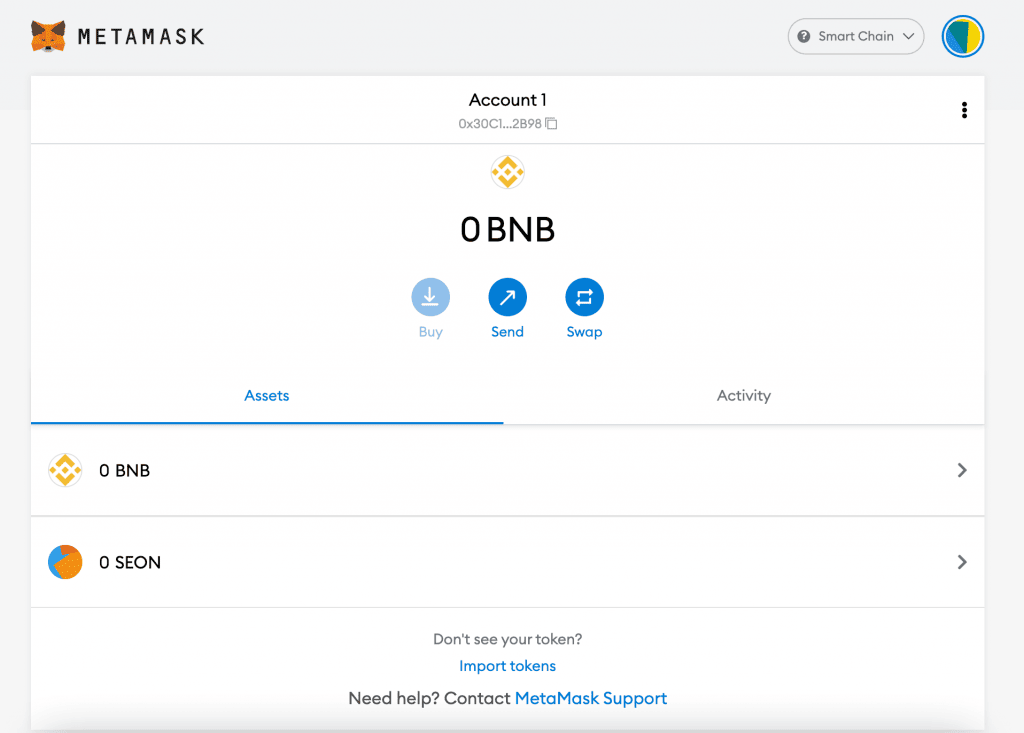
Add SEON Token to your wallet
Now that we have connected your wallet to the BSC network, we can add SEON Token to your wallet. This is an easy task to do as described below:
- Copy SEON’s token contract address to your clipboard: 0x7672843c25c5ba11191da8da40c0881d7e77d9e0.
- Go to the main screen of your MetaMask extension and click the‘Import token‘ button.
- In the ‘Import Tokens‘ screen that will show up, fill in the ‘Token Contract Address’ input with the above contract. MetaMask should then automatically fill in the token’s symbol and decimals for you, then click ‘Add Custom Token‘.
- Confirm your action by clicking the ‘Import token‘button.
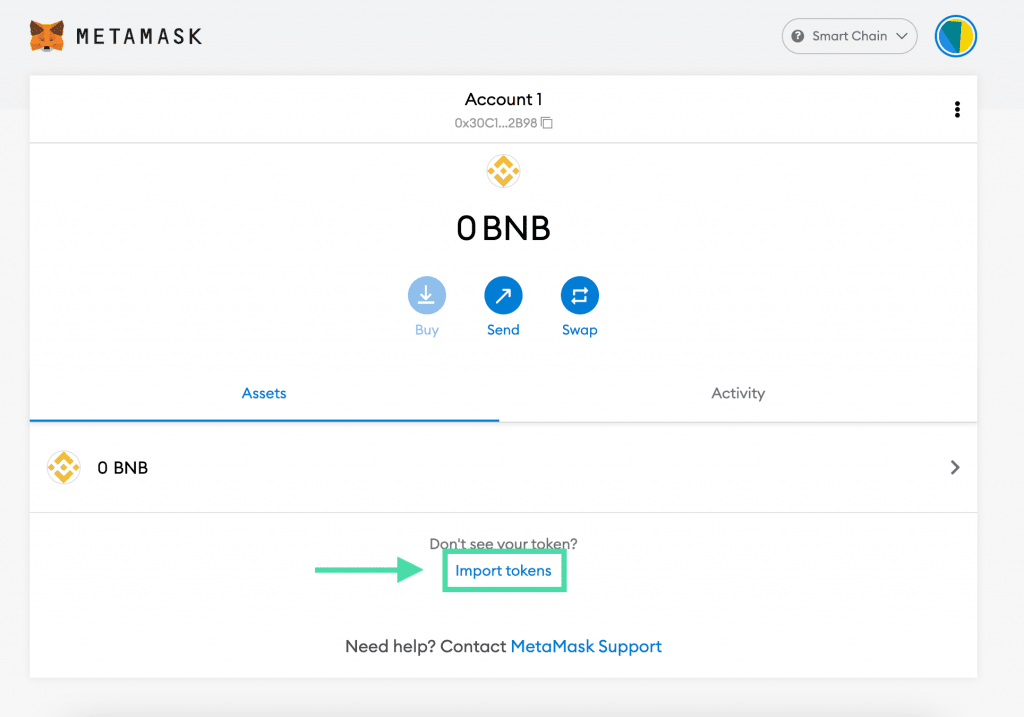
Click ‘Import tokens’ button to start importing SEON to MetaMask
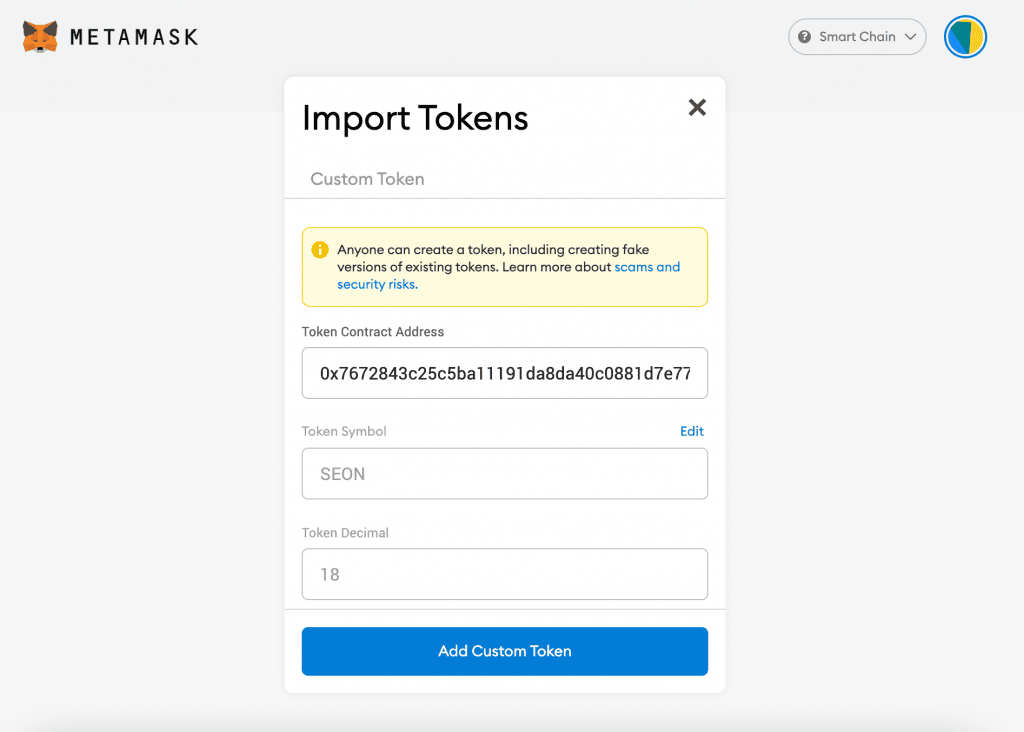
Paste SEON’s creation contract address to the ‘Token Contract Address’ field
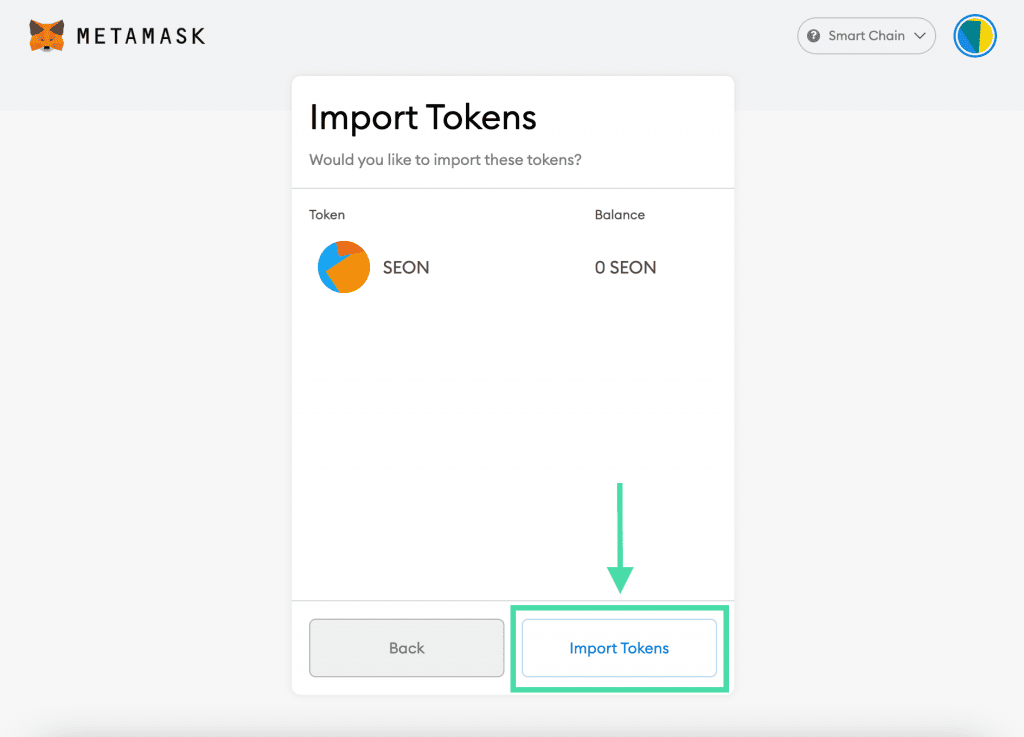
Confirm the import of SEON token to your wallet
Congratulations!
You have now successfully added SeedOn’s token to your wallet.